
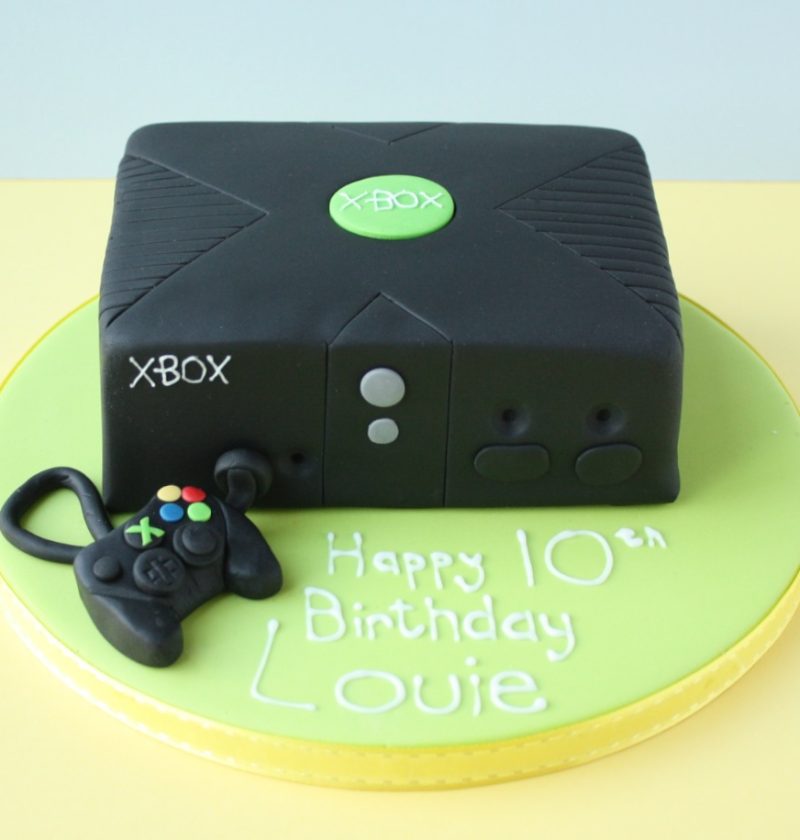

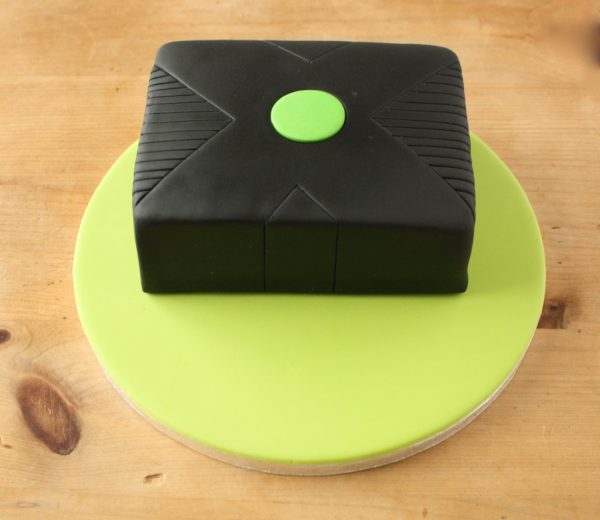
This is an Xbox cake I made for Free Cakes For Kids. I always love getting asked to make cakes for the charity because it gives me such a warm and fuzzy feeling inside but this one was a bit of a concern. “Why?” I hear you ask. It’s just a black box. All kids love an XBox. It’s just a small cake. It shouldn’t be a problem for you oh cake obsessed Emma. Oh no, that wasn’t the problem. The problem was that we don’t have one and I know absolutely nothing about them and when you google Xbox a ton of images appear and having no experience whatsoever meant that I literally didn’t know where to start. The request was for an Xbox cake for a 10 year old boy who loved the FIFA football game.
Stumped!
Then Tim said “Just make the box with a controller. Don’t make it too difficult” after I was trying to work out how to get a FIFA game incorporated. And as always, he was right (just don’t tell him okay!) So that’s what I did and I have to say it was a really lovely cake to make. Pretty straight forward, simple design, black sugarpaste with grooves cut into it. And although I don’t like to make black cakes – especially for kids, the mum was overwhelmed by it when she saw it. I don’t know what she was expecting but she was so thrilled with it. I totally welled up when I saw her response (to be honest I’m welling up now just thinking about it) I’ve said it before and I’ll say it again. Giving something as simple as a cake to someone is the best feeling in the world. It says I care and I don’t even know you. I urge you to find your local group and give it a try.
How to make an XBox cake

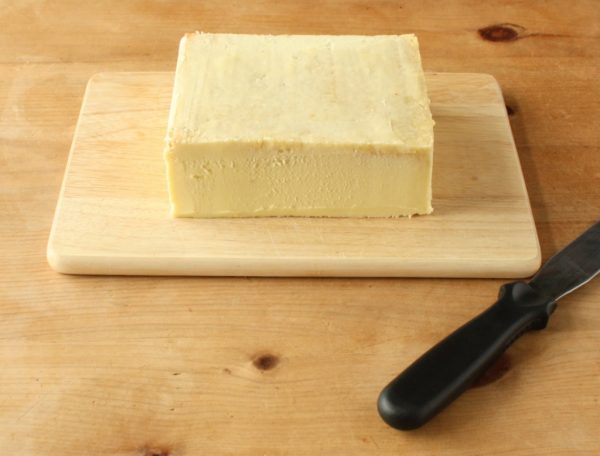
I baked a rectangular cake and as it was so small I didn’t cut it in half to fill it with buttercream. I did a test and it turns out that plain old Madeira cake is just as yummy with just butter cream and sugarpaste on the outside.
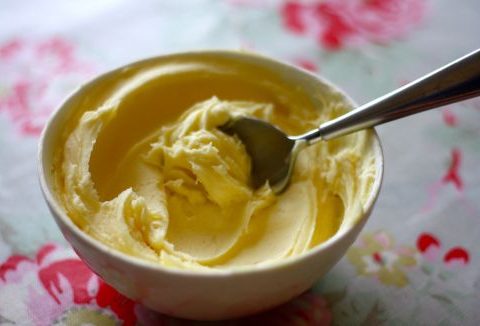
The cake was covered with a crumb coat and then a second outer coating of buttercream making sure that the edges were as smooth and flat as possible.
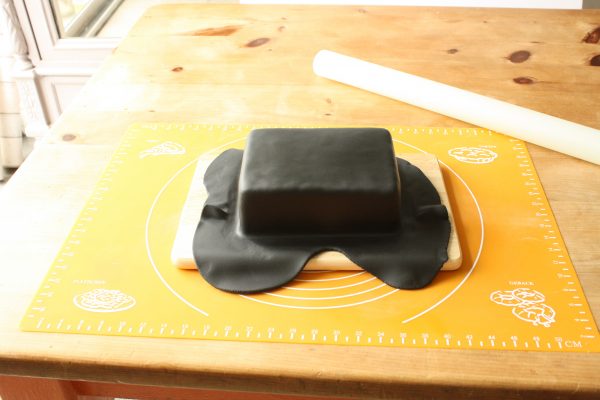
The cake was then covered in black sugar paste. When using black paste it’s really important to make sure every surface is as clean as possible. Every little grain of icing sugar will look like massive spot on your cake. It’s difficult to do as the black sugarpaste is the stickiest of all the colours.
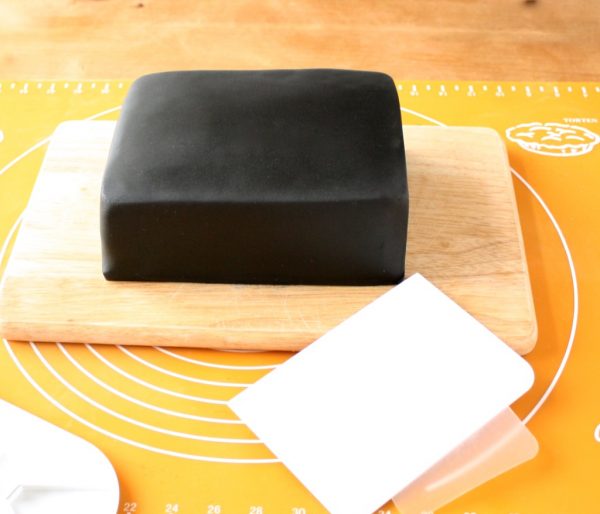
Smooth the sugarpaste till it’s nice and flat and remove the excess, then use side scrapers to get nice ‘pointed’ corners. I’m still working on this technique. It doesn’t really matter if they aren’t super sharp but the sharper the better. The way to do this is to hold one scraper flat on the top of the cake so it’s overhanging the cake and smooth from the side with the other scraper. The scrapers should meet at the edge. This gives the sharp edge. I’m getting there….slowly. Practice, practice, practice!
I then made a template to fit on my cake so I could mark where the grooves needed to go. You can download/print my template here. Enlarge or reduce it to fit your cake.
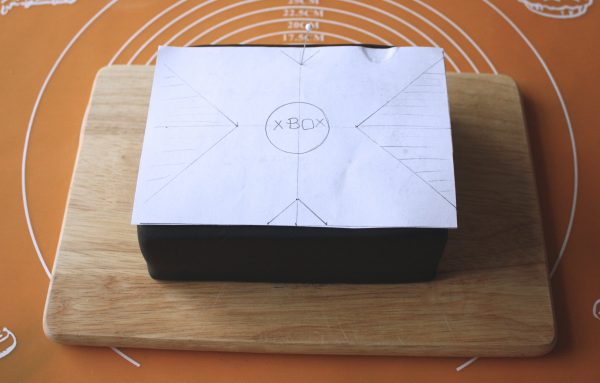
To make the marks I use a pin which has been sterilised in alcohol. Just pierce the paper into the sugarpaste.
I did the marks slowly – one at a time rather than all in one go. I was worried the paper would move or it wouldn’t look right. I had more control this way.
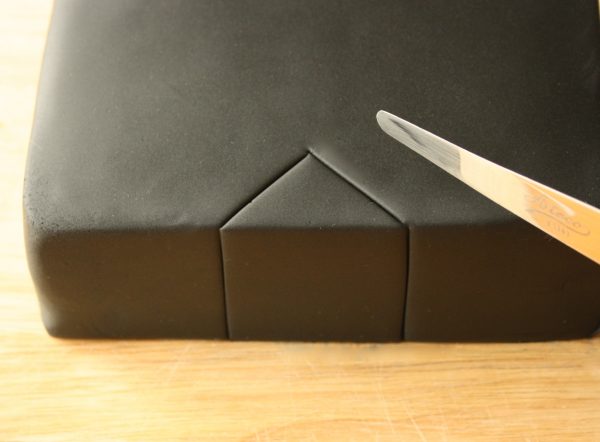
I used a thin palette knife to create the groove lines.
The lines weren’t as straight as I hoped but once they were all done I think I got away with it. Next time I’ll mark each line and create grooves between them.
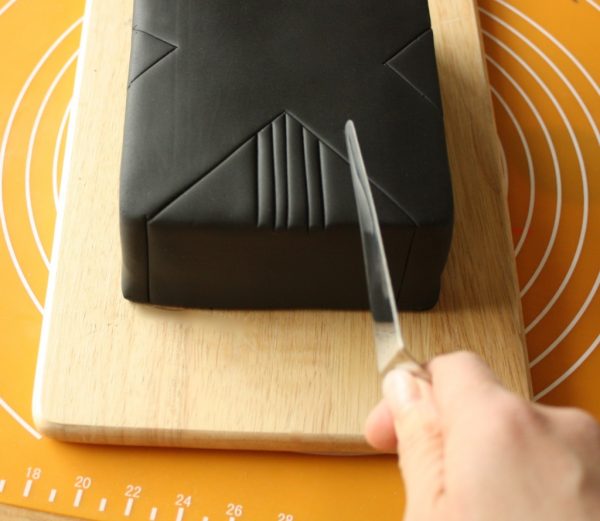
Then came the tricky part. I cut out the circle in the centre )that’s the hard bit- working out where the centre is!) I made sure I went right through the sugarpaste so that when I removed the cutter I could just stick the pallette knife in the centre and lever it out. It works every time!
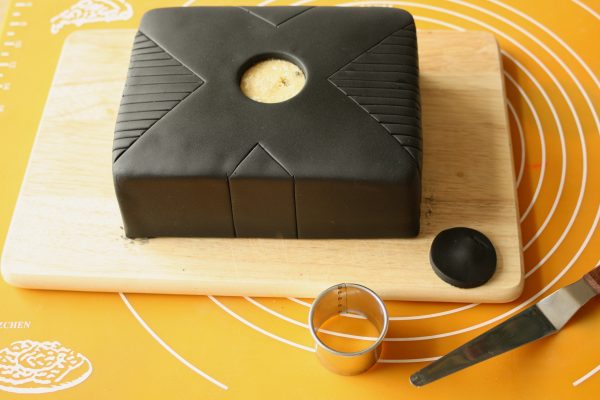
Use the same size circle cutter to cut out a green circle and place it in the hole using a little buttercream to ‘stick it down’. Try to roll out the green sugarpaste to the same thickness as the black so the top of the cake is flat.
I covered the cake board in the same green a week before and left it to harden so there wouldn’t be any finger prints in it. The cake was secured onto the board with a little royal icing.
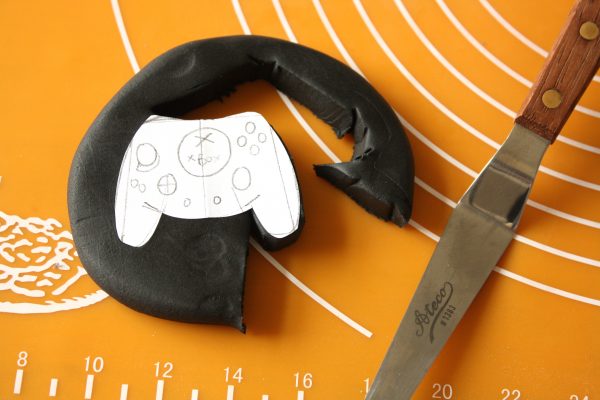
To make the controller I used the paper template and cut out a block of black sugarpaste then curved and shaped it.

I used tiny circle plunger cutters to make the buttons and controllers and made them stick by dampening the underneath of them with cooled boiled water. I used the same technique to add buttons to the front of the box. I also made big dents/holes in the front using a bulbous cone tool.

To finish a black length of sugarpaste which had been rolled into a string was added to the box and controller and the writing was added.
In all a really fun cake to make.
I hope you enjoyed this tutorial. Bye for now
EmmaMT
More Kids Birthday Cakes you may enjoy
How to make a merry go rounds birthday cake
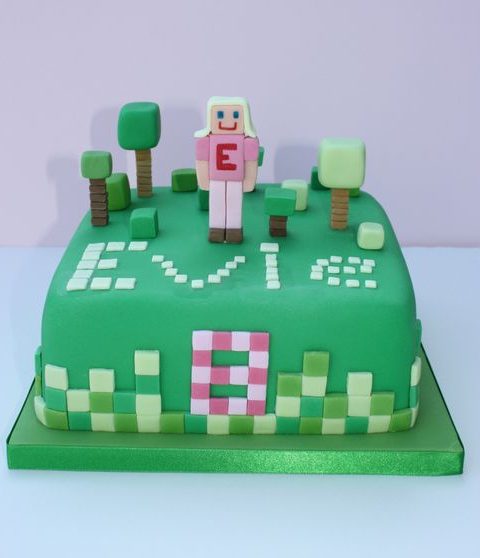
How to make a Minecraft birthday cake
How to make Beau’s sleepover cake
How To Make A Swimming Pool Cake
How to make a Mario and Yoshie Birthday Cake
Twitter and the horse birthday cake
Merry Go Round Cookie Birthday Cake
How To Make A Rock Climbing Birthday Cake
You are so right when you say that baking a cake for a stranger in need is such a satisfying way to connect with your community. Thank you for a fantastic cake!
I join so i can learn to make xbox cake for my sons 12 birthday in june need learn early so i get it right
Oh it’s a great one to bake. The kids LOVE it!
Happy baking
EmmaMT