

How to make a Rock climbing birthday cake
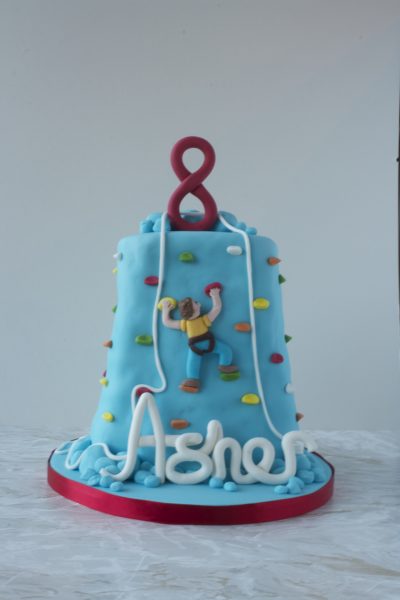
My little nephew Asher isn’t that little any more! He’s eight already. Last weekend he had a climbing party and before Christmas he told me exactly what he wanted his cake to be. Yes I know, you can see it’s a rock climbing cake!
The party was for 7 kids so I did go a little over board with the size of this cake. It could have fed 40! Well, I do only have one nephew! (on that side of the family anyway!)
How to design a rock climbing cake
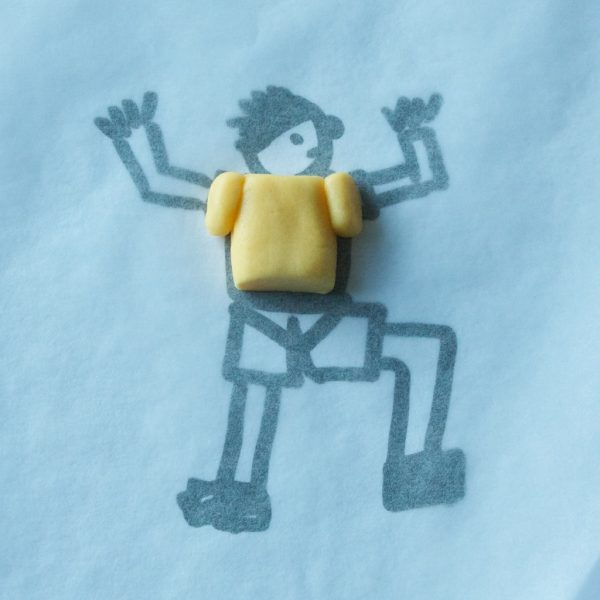
I started off with a drawing of the climber. I am often disappointed with the models I make – thinking that legs or arms look too long/short/wonky, so I decided to make a plan. You know the saying “Fail to plan and you plan to fail” I wanted to use the drawings as guides.
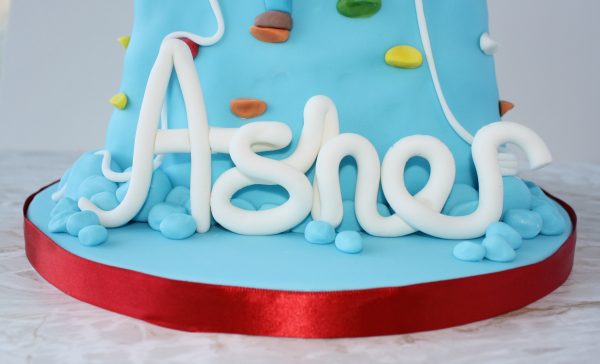
Making the loopy name
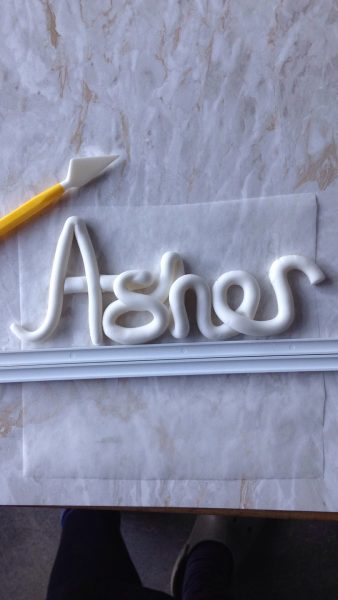
To make the name and climber firm enough to handle I made them a week before the party. The name was made by rolling out a long strip of white sugar paste with a little Tylo Powderkneaded in. Tylo powder has a firming action on the icing. It gets harder much quicker than when left to dry naturally over a few days – I wanted to be sure it wouldn’t break.
A piece of silicon paper was positioned over the hand written name then I bent and looped the sugarpaste strip cutting and gluing from behind using edible glue where necessary- mainly behind the ‘A’. I then placed it along marzipan spacers to make sure it was level and set it on a tray to dry out.
Making the climber
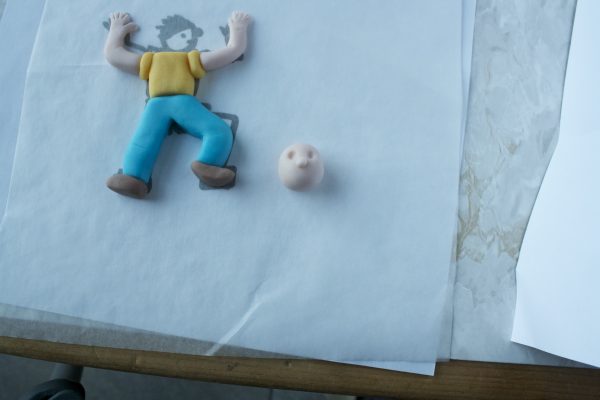
Having a guide for the climber made it so much easier. I will definitely make models this way again. The climber was also made with sugarpaste. First the Tshirt was made then the legs were attached. I made the sugarpaste damp and pressed each piece together but next time I will use edible glue. After a few days the arms hadn’t stuck so I had to use edible glue in the end anyway.
The arms were easy to make and I simply cut lines in the flattened ends to make fingers. Then a decorators tool was used to soften the edges and make fingernails. (the pic below is before the fingers were softened!) Once the arms and shoes were attached I made a hole in the neck using a cocktail stick. This is so that the head can be attached later.
To make the head
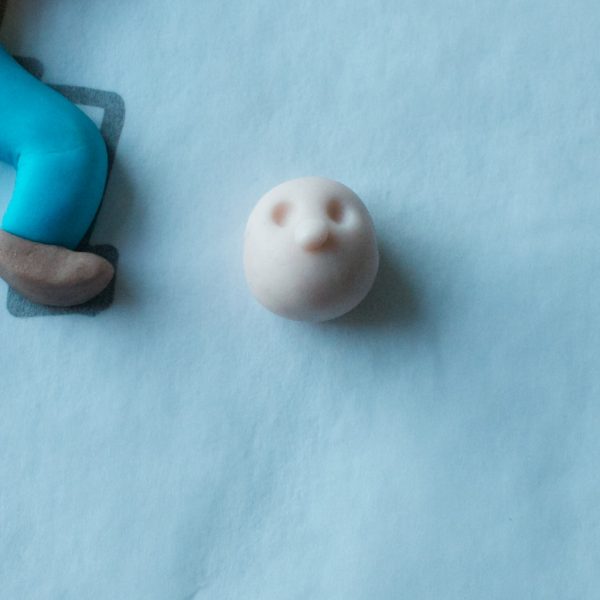
A piece of white sugarpaste was coloured with a dot of paprika coloured food gel and was rolled into a ball. A balling tool was used to make dents for the eyes and a tiny ball for the nose. White balls of sugarpaste were placed in the eye sockets and a small dent was made for the smile. A cocktail stick was cut in half and then pushed in to a piece of polystyrene so only 1cm stuck out and the head was then placed on top. In my experience if you try to push the stick into the sugarpaste the head will either contort or the cocktail stick will poke out of the top, either way – we don’t want that. This way you have more control. Once the head is on the stick leave it to go hard enough to handle without squishing – 3-4 days.
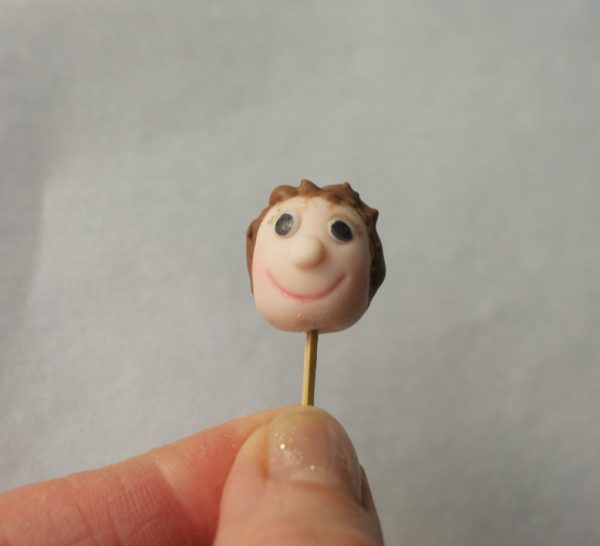
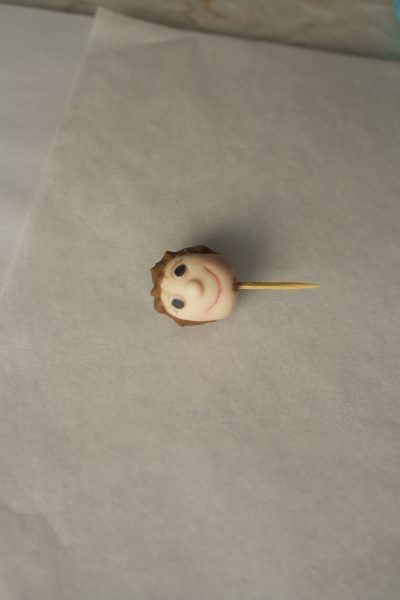
After 3-4 days the head was then decorated with pale brown eye brows and tiny eyelashes and the eyes were painted black. A very pale pink was used to outline the mouth. A dry brush was used to dust a tiny amount of pink powder onto the cheeks to give them a glow. Finally the brown royal icing hair was piped on the top. A cocktail stick was used to make the hair a bit more curly. Again it was left to completly firm up. The head is the last thing to go on once the body is on the cake.
To stack the cake
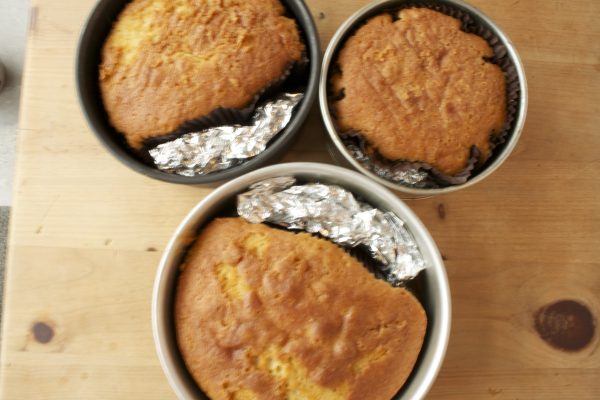
This cake was always going to be bumpy in texture – yay for not having to make a cake look perfectly smooth!! – and I wanted it to have a flat front. So as not to waste any cake mix I used round cake tin liners (like these cake tin liners) and scrunched up some tin foil to make up the space along one side of a 6, 7 and 8″ cake tin while they were baking- yes I know – waaaayyyy too much cake! Once out of the tins there wasn’t much carving to do.
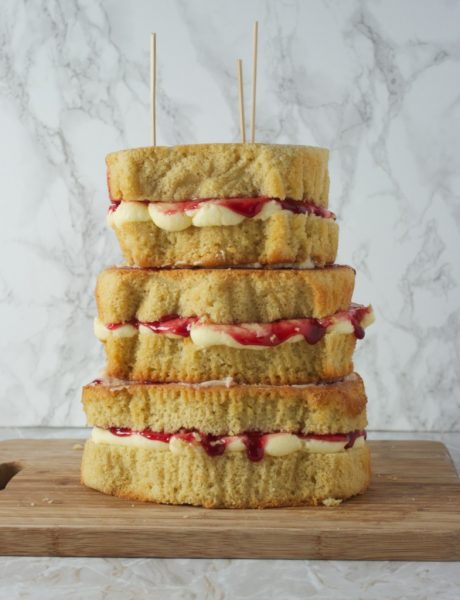
Each Madeira cake was cut in half and the middle was filled with seedless raspberry jam and buttercream and the same between each cake – that’s why it got so tall! I didn’t want to put boards between the cakes – which you should do with a cake this big so I used skewers to keep the whole cake together. I was really nervous driving this cake to my sister’s house so if you are travelling with a cake this tall stack it properly with boards and dowels like this. The front was trimmed so it was less bumpy and the whole cake was given a buttercream coating.
To cover the cake
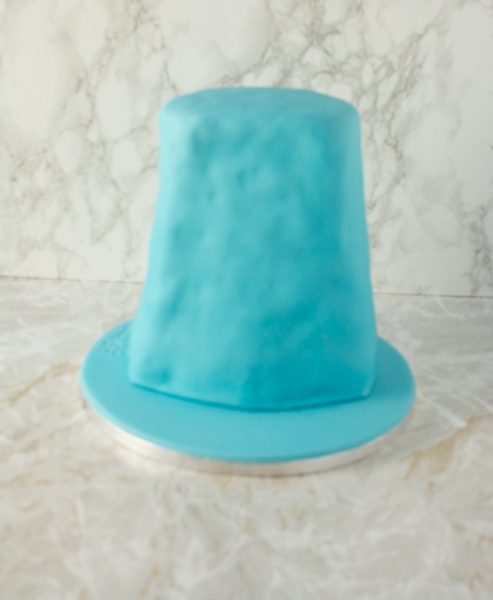
The blue icing was rolled out so it could be lifted over the tall cake. This was no mean feat and if this was a wedding cake of this size I would have covered the sides then the top but as it is I went for one big covering. I did have a seam at the back but for this cake it wasn’t a problem. I made it as neat as I could.
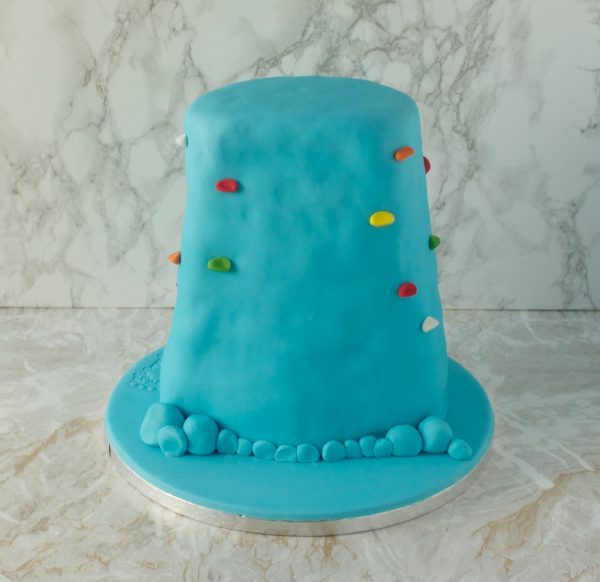
I wanted the surface to be gently bumpy so I dug my fingertips all over the blue sugarpaste to give a more rock like appearance. I then added the rock climbing handles. These were made by rolling our different coloured sugarpaste into balls then flattening one side of the ball and adhering them all over the cake with edible glue. I loved the colours- perfect for an eight year old.
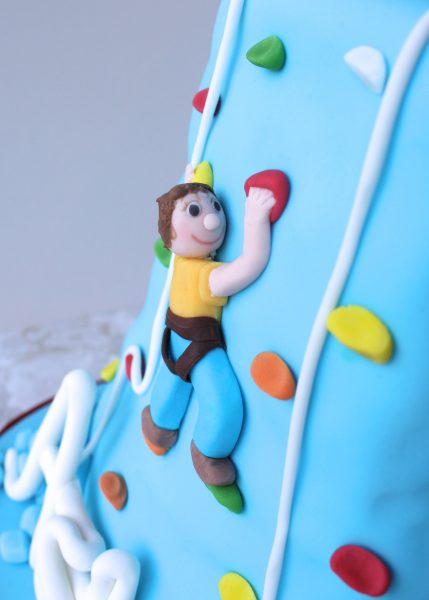
Adding the climber
To stick Asher the climber onto the cake I stuck coloured climbing handles under his hand while the handle sugarpaste was still soft. I pushed the dried hands into the soft sugarpaste so it looked like he was gripping them. Piping royal icing into the hole in the body before I stuck his head in place – this has been a winner for not having models loose their heads! To stick the model onto the cake I used royal icing under the hands, body and behind the feet. Once I had positioned him and held him there for 30 seconds I placed a cocktail stick into the cake under the feet to stop him slipping down. Once I knew he was well and truly stuck I replaced the cocktail sticks with climbing handles.
Finishing touches
The bottom of the cake looked a bit plain so I made different sized rocks to match the cake covering and placed them all around the bottom of the cake. I made bigger ones for the very left and right of the cake for the name to sit against. Royal icing was piped onto the back of the ‘Asher’ to stickit to the rocks.
I decided to make the ‘8’ to sit on the top at the last minute. To make sure it was hard I mixed the red sugarpaste with some Tylo powder, rolled it out and shaped the number then pushed a cocktail stick diagonally into it. I then placed it in the oven at 50ºC for 10 minutes. I removed it, let it cool completely then repeated. On the second cool it was firm. I left it over night to give it an extra chance to harden then stuck it in the cake the next morning with a little royal icing for good measure and had a few blue rocks around it for effect. This worked really well but the red colour did darken a little.
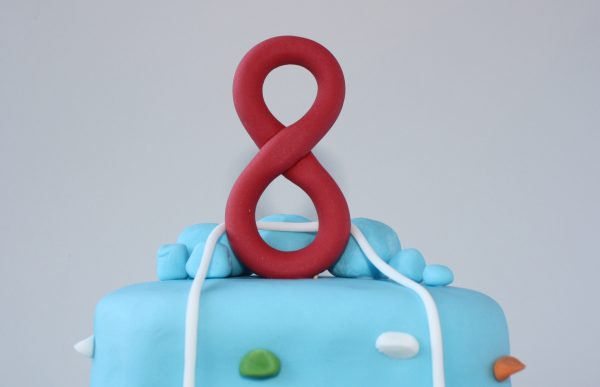
The last addiditons were the long strand of rope which was looped around the eight with a little curl at the bottom and the harness I added to the climber.
The last addiditons were the long strand of rope which was looped around the eight with a little curl at the bottom and the harness I added to the climber.
really loved this cake. It was a monster in size but the colours worked really well and I tried out a few new techniques that I will definitely do again like the way I did the name and using a plan to make the model.
When I delivered the cake before the party Asher came to see it and didn’t say a word – he just hugged me really tight for what seemed like ages. Ahhhhh, I love that. Big love from the little man. So all that’s left to say is
Happy Birthday ADF. I’ve gotta lotta love for you!
EmmaMT x
More Kids Birthday Cakes you may enjoy
How to make Beau’s sleepover cake
How to make a Mario and Yoshie Birthday Cake
Twitter and the horse birthday cake
Emma you really are a genius cake decorator. I’m sure your nephew absolutely adored his cake, I think the big hug says it all. 🙂